This article is intended for people skilled in web design, HTML and CSS. If you are inexperienced in these areas, we strongly recommend using the free database publishing service dbBee at http://www.dbbee.com
Based on our experience, there are more people working with Excel than those working with Access. However, lots of them have no idea that they can use their Excel sheets as databases, and especially have no idea that those databases can go online. The truth is that you cannot publish just any kind of sheet, it has to follow specific rules (mostly about structure), but still it is something that any Excel user can prepare.
I'll first explain what your Excel sheet should look like, and then I'll show you simple example of publishing it online.
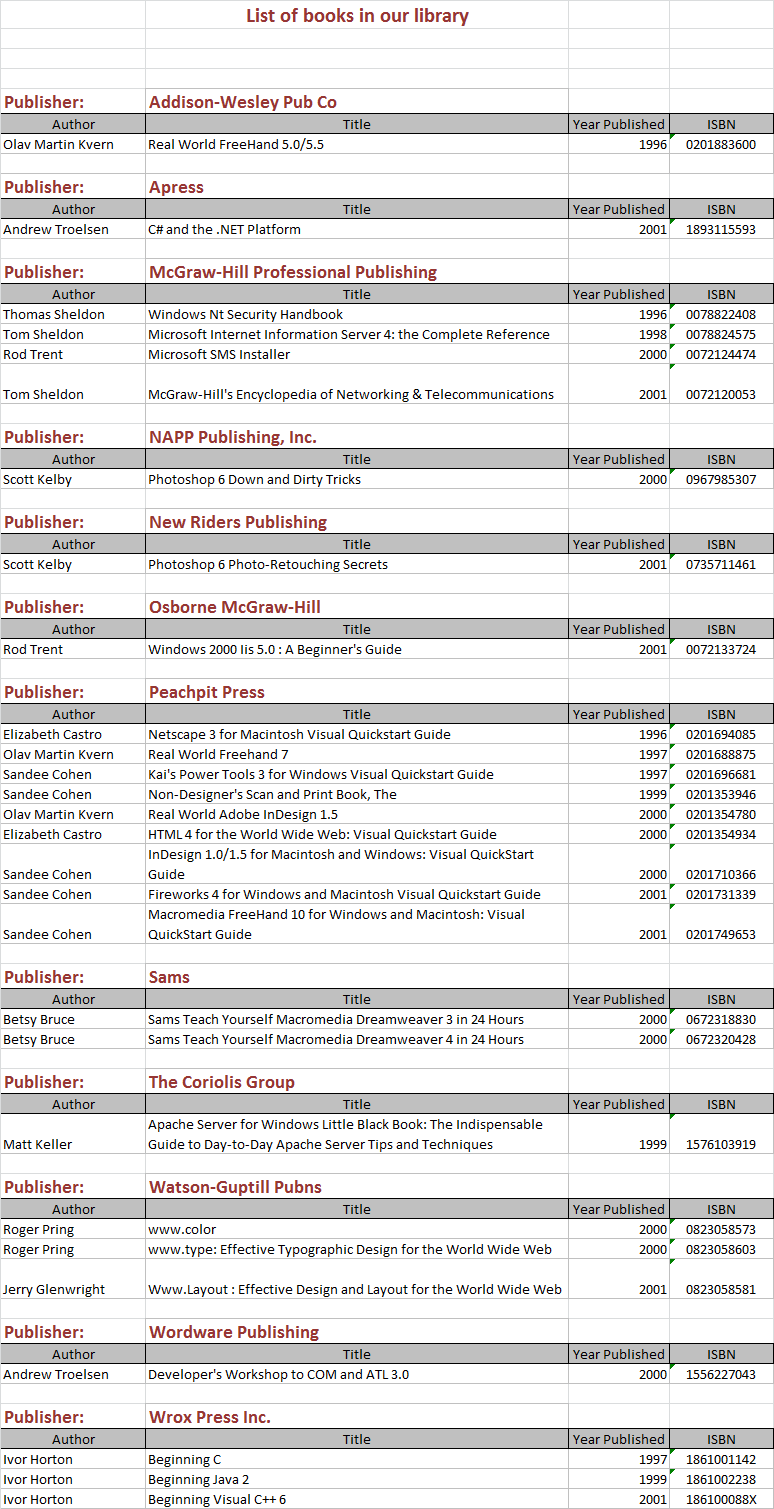
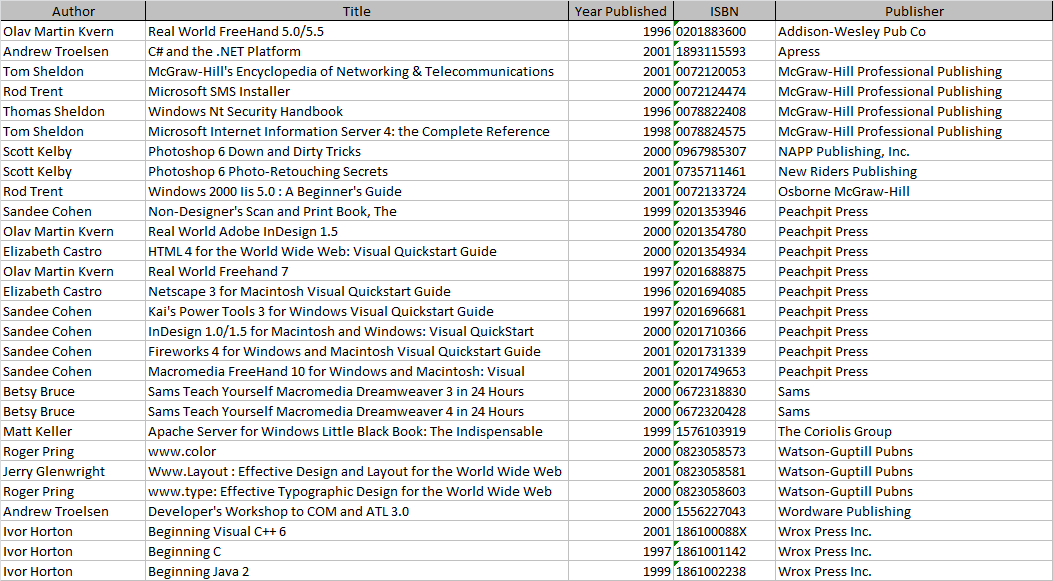
Look at these two sheets. First one (see image Sheet 1) is arguably nicer, more readable and definitely looks more professional. However, it is completely useless for publishing online. So to make it �opublishable�? we removed all labels (multiple column headings, �oPublisher�? labels and sheet title) and modified its structure by adding new column �oPublisher�? and filling it with proper value in every single row (see image sheet 2).
Now when we have our data organized in correct form we can publish it online. First make sure that you named your sheet �oTitles�? and saved workbook as �obiblio.xls�?. The basic code for publishing Excel sheet is very simple as you can see below:
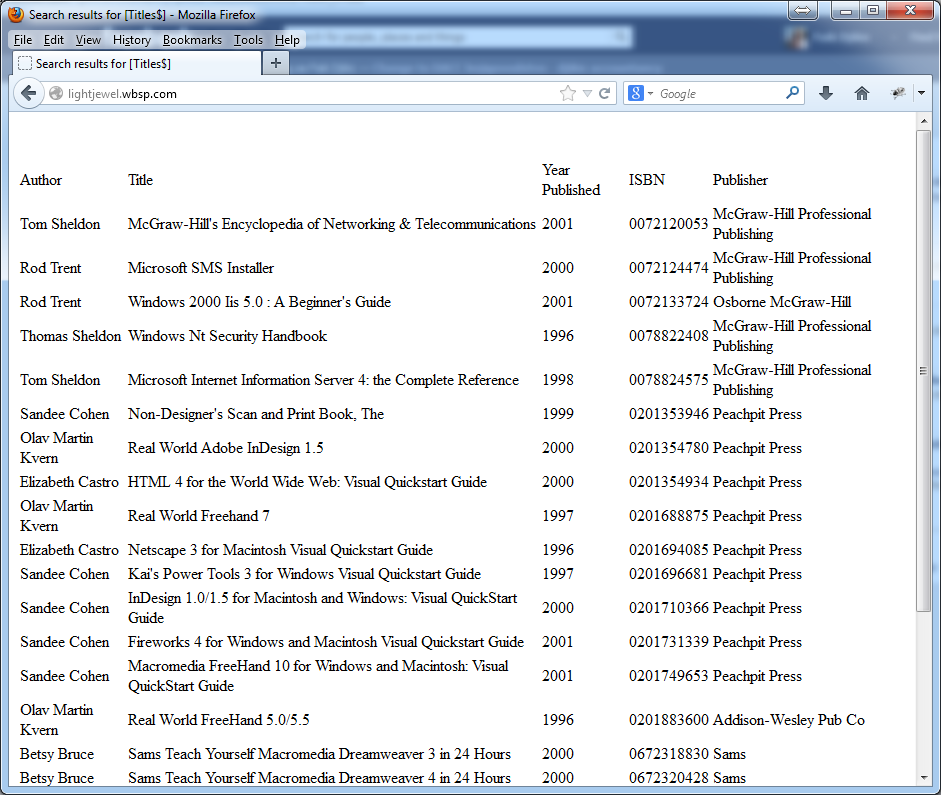
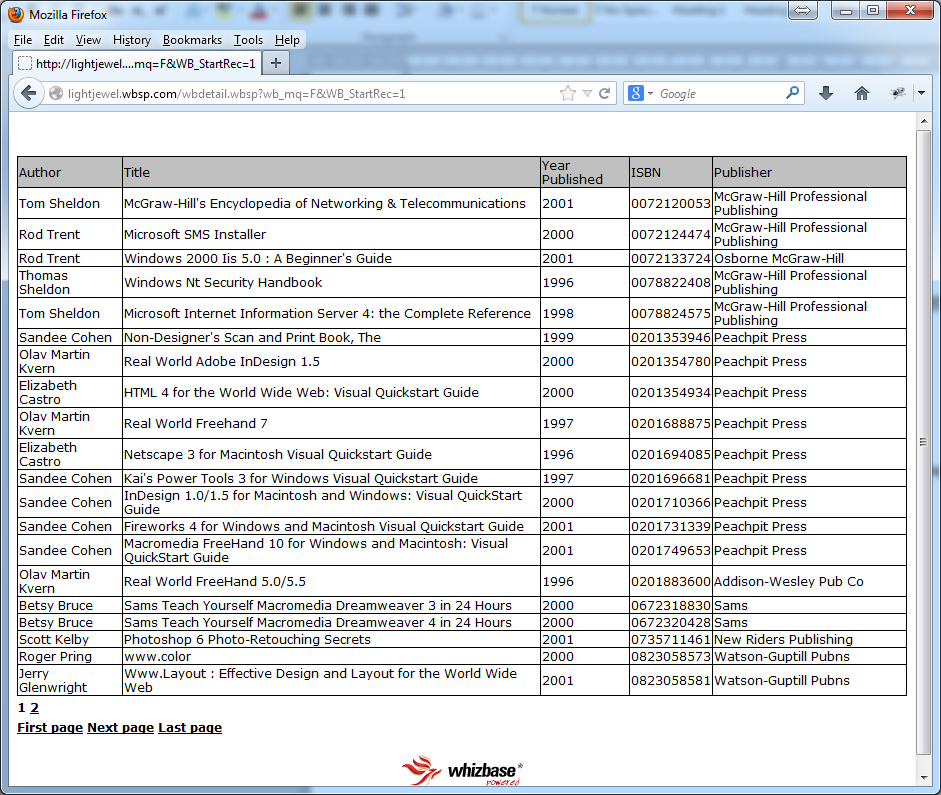
Executing this code will produce a report in form of HTML document (standard web page) displaying first 20 rows with navigation links to other report pages located on the bottom (see image report1).
Well, this shows that our code works, but it is not exactly what we want to publish. Some styling would make this report look more professional. So let’s add some styling. In code above we used default report template that can’t be modified and usually we use it only for development (testing) purposes. Modified code will look like this:
If you compare the two you’ll see that later code does not contain variable WB_TempName, but instead it contains some basic HTML code and WhizBase function $wbdetail. Now we can control report’s style and appearance by adding some CSS. I’ll do it in same file (to make the code easier to follow), but you can create separate css file. Just make sure to create following classes:
Also I’m going to add style for navigation links in section [MsgAndLbl]
Now our modified code looks like this:
With these modifications our report looks much more professional, as you can see on image report 2.
This example shows the very basic usage of WhizBase with Excel sheet. It can be modified to include a simple (or even advanced) search form and sorting options. For help with adding search form and sorting please email us at support@whizbase.com.